


In questo tutorial ti insegnerò come sfruttare i feed di notizie RSS cosi da arricchire i siti web. Imparerai come popolare i feed di notizie RSS utilizzando HTML e PHP, creare un feed RSS con PHP e MySQL e acquisire informazioni da un modulo HTML per archiviarle in un database MySQL.
La tecnologia si sta trasformando intorno a noi a un ritmo esponenzialmente veloce e quindi l’implementazione di un feed di notizie RSS potrebbe potenzialmente aumentare le relazioni con te e i tuoi utenti rimanendo aggiornati con le informazioni più recenti.
Cos’è l’RSS e perché dovrei usarlo?
RSS, noto anche come Really Simple Syndication, è una tecnologia che consente agli utenti di condividere informazioni da più fonti in un’unica posizione, come articoli sui loro siti Web, le ultime notizie e altro ancora.
Crea un nuovo file chiamato style.css nella cartella del tuo progetto e aggiungi:
* {
  box-sizing: border-box;
  font-family: system-ui, "Segoe UI", Roboto, Helvetica, Arial, sans-serif, "Apple Color Emoji", "Segoe UI Emoji", "Segoe UI Symbol";
  font-size: 16px;
}
body {
  background-color: #FFFFFF;
  margin: 0;
}
.header {
  display: flex;
  align-items: center;
  justify-content: center;
  padding: 80px 0;
}
.header .title {
  margin: 0;
  padding: 0;
  color: #3f4754;
  font-size: 34px;
}
.header .title::after {
  content: " ";
  display: inline-block;
  width: 50%;
  transform: translate(50%, 0);
  border-bottom: 4px solid #dee2e7;
}
.items {
  display: flex;
  flex-flow: column;
  align-items: flex-start;
  max-width: 850px;
  width: 100%;
  margin: 0 auto;
  padding: 0 15px;
}
.items .item {
  display: flex;
  text-decoration: none;
  margin-bottom: 40px;
}
.items .item .image {
  border-radius: 15px;
  max-width: 300px;
}
.items .item .details {
  padding-left: 30px;
}
.items .item .details .title {
  margin: 0;
  padding: 10px 0;
  color: #556071;
  font-size: 24px;
}
.items .item .details .date {
  display: block;
  color: #b3bac6;
  font-size: 14px;
  font-weight: 500;
  padding-top: 10px;
}
.items .item .details .description {
  color: #8792a5;
  font-size: 16px;
  margin: 0;
  padding: 5px 0;
}
.create-news {
  display: flex;
  flex-flow: column;
  width: 100%;
  max-width: 500px;
  margin: 50px auto;
  box-shadow: 0 0 10px rgba(0, 0, 0, 0.1);
  border-radius: 10px;
  overflow: hidden;
  background-color: #fff;
}
.create-news h1 {
  margin: 0;
  padding: 25px 20px;
  font-size: 20px;
  font-weight: 500;
  color: #3f4754;
  border-bottom: 1px solid #eff2f5;
}
.create-news form {
  display: flex;
  flex-flow: column;
  align-items: flex-start;
  padding: 20px;
}
.create-news form label {
  font-weight: 500;
  font-size: 14px;
  color: #74787c;
  padding-bottom: 10px;
}
.create-news form label .required {
  color: #ff1212;
  margin-right: 5px;
}
.create-news form input, .create-news form textarea {
  margin-bottom: 20px;
  width: 100%;
  padding: 10px;
  border: 1px solid #dee1e6;
  border-radius: 4px;
  font-size: 16px;
}
.create-news form input:focus, .create-news form textarea:focus {
  outline: none;
  border-color: #3f4754;
}
.create-news form input::placeholder, .create-news form textarea::placeholder {
  color: #a2a4a8;
}
.create-news form button {
  appearance: none;
  padding: 10px 15px;
  margin-top: 5px;
  border: none;
  border-radius: 4px;
  font-size: 14px;
  font-weight: 500;
  background-color: #167cdb;
  color: #FFFFFF;
  cursor: pointer;
  box-shadow: 0 0 7px rgba(0, 0, 0, 0.15);
  transition: background-color ease 0.2s;
}
.create-news form button:hover {
  background-color: #292e37;
}
.create-news form .msg {
  margin: 0;
  padding: 5px 0 20px 0;
  font-size: 14px;
  font-weight: 500;
}
.create-news form .msg.success {
  color: #07b94c;
}
.create-news form .msg.error {
  color: #be2c2c;
}
Questo sarà sufficiente per rendere le nostre pagine eleganti, ma sei libero di personalizzare le proprietà a tuo piacimento.
Implementazione RSS
In questa sezione tratteremo gli aspetti fondamentali dell’implementazione dei feed di notizie RSS con le nostre app Web. Nel nostro caso, utilizzeremo PHP (linguaggio lato server), MySQL (integrazione del database) e HTML per strutturare le nostre pagine.
Integrazione del database MySQL
Per integrare il database MySQL con la nostra app, possiamo sfruttare l’interfaccia PDO con PHP, che utilizza vari metodi per recuperare e archiviare i record MySQL.
Possiamo evitare il noioso compito di creare un database eseguendo la seguente istruzione SQL con phpMyAdmin (o il tuo strumento di gestione del database preferito)
CREATE DATABASE IF NOT EXISTS `phpnewsfeed` DEFAULT CHARACTER SET utf8 COLLATE utf8_general_ci;
USE `phpnewsfeed`;

CREATE TABLE `news` (
  `id` int(11) NOT NULL AUTO_INCREMENT,
  `title` varchar(255) NOT NULL,
  `description` varchar(255) NOT NULL,
  `img` varchar(255) NOT NULL,
  `url_link` varchar(255) NOT NULL,
  `published_date` datetime NOT NULL,
  PRIMARY KEY (`id`)
) ENGINE=InnoDB DEFAULT CHARSET=utf8 COLLATE=utf8_general_ci;
Ora possiamo implementare il codice PHP per connetterci al nostro database. Per fare ciò, crea un nuovo file chiamato rss.php e aggiungi:
<?php
// Database connection variables
$db_host = 'localhost';
$db_name = 'phpnewsfeed';
$db_user = 'root';
$db_pass = '';
$db_charset = 'utf8';
// Connect to the database using the PDO interface
try {
    $pdo = new PDO('mysql:host=' . $db_host . ';dbname=' . $db_name . ';charset=' . $db_charset, $db_user, $db_pass);
    $pdo->setAttribute(PDO::ATTR_ERRMODE, PDO::ERRMODE_EXCEPTION);
} catch (PDOException $exception) {
    // If there is an error with the connection, stop the script and display the error.
    exit('Failed to connect to database!');
}
// ADD CODE IN NEXT SECTION BELOW
?>
Abbiamo dichiarato variabili che possiamo modificare per riflettere le credenziali del nostro database. Se i dettagli non sono validi, verrà visualizzato un errore.
Questo è praticamente tutto ciò che dobbiamo fare per quanto riguarda l’integrazione del database. Nella sezione successiva, recupereremo i record delle notizie dal database e li popoleremo in formato XML.
Genera il file XML del feed di notizie RSS
Per generare il contenuto XML, dobbiamo prima definire la struttura del nostro documento RSS, che contiene gli elementi essenziali necessari per la sua validità.
Ma prima di farlo, recuperiamo le voci più recenti dal nostro database. Durante la modifica del file rss.php, trova:
// Select the ten most recent items from the news database table
$stmt = $pdo->prepare('SELECT * FROM news ORDER BY published_date DESC LIMIT 10');
$stmt->execute();
$news = $stmt->fetchAll(PDO::FETCH_ASSOC);
Nel codice sopra, stiamo mescolando il codice PHP con XML. Questo perché dobbiamo iterare e popolare le nostre notizie utilizzando i tag RSS. Abbiamo incluso tutti i tag e i valori rilevanti per incorporare RSS con PHP. Aggiorna i tag del canale per riflettere i tuoi dettagli (titolo, collegamento, descrizione, ecc.).
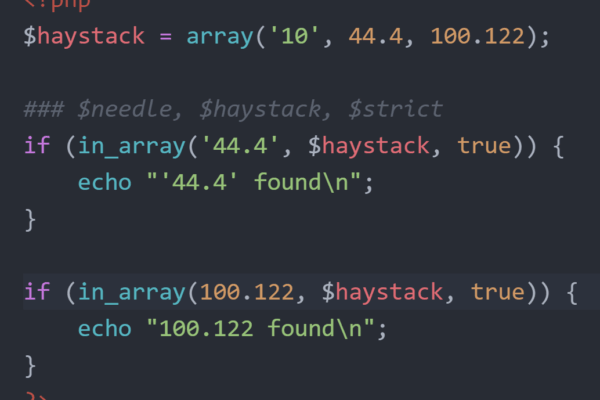
Lo sapevate?
La funzione htmlspecialchars() converte i caratteri speciali in entità HTML e quindi impedisce l’esecuzione dei tag secondari all’interno dei tag RSS.
Se accediamo al file su localhost, genererà il documento come XML. Questo è tutto ciò che dobbiamo implementare per questo file. L’intero concetto è condividere il documento con i tuoi utenti, in modo che possano iscriversi al tuo feed di notizie senza visitare direttamente il tuo sito web.
Compila il feed RSS
In questa sezione tratteremo le nozioni di base per popolare in modo efficiente un feed di notizie RSS esterno con PHP. Sfrutteremo i metodi PHP per ottenere il risultato desiderato.
Crea un nuovo file chiamato read.php e aggiungi:
<?php
// Replace with the URL of the RSS feed you want to retrieve
$url = 'http://localhost/phpnewsfeed/rss.php';
// Create a new instance of the DOMDocument class
$dom = new DOMDocument();
// Load the RSS feed
if (!$dom->load($url)) {
    exit('Failed to load RSS feed! Please check the URL!');
}
// Retrieve the items from the RSS feed
$items = $dom->getElementsByTagName('item');
// Below function will convert datetime to time elapsed string.
function time_elapsed_string($datetime, $full = false) {
    $now = new DateTime;
    $ago = new DateTime($datetime);
    $diff = $now->diff($ago);
    $w = floor($diff->d / 7);
    $diff->d -= $w * 7;
    $string = ['y' => 'year','m' => 'month','w' => 'week','d' => 'day','h' => 'hour','i' => 'minute','s' => 'second'];
    foreach ($string as $k => &$v) {
        if ($k == 'w' && $w) {
            $v = $w . ' week' . ($w > 1 ? 's' : '');
        } else if (isset($diff->$k) && $diff->$k) {
            $v = $diff->$k . ' ' . $v . ($diff->$k > 1 ? 's' : '');
        } else {
            unset($string[$k]);
        }
    }
    if (!$full) $string = array_slice($string, 0, 1);
    return $string ? implode(', ', $string) . ' ago' : 'just now';
}
?>
Nel codice sopra, stiamo approfondendo la classe DOMDocument che ci consente di manipolare il documento XML. La classe è fantastica perché non è necessario analizzare da soli il file XML e utilizzare vari metodi, come Regex, per trovare tag specifici, cosa che può essere sofisticata da ottenere.
La funzione time_elapsed_string convertirà il formato MySQL DateTime in una stringa trascorsa (ad esempio, 15 giorni fa). Sarà coerente con il nostro feed perché recupereremo solo le notizie più recenti.
Assicurati di aggiornare la variabile $url per riflettere l’URL del tuo feed di notizie RSS.
Ora dobbiamo implementare il codice per iterare l’oggetto DOM e dichiarare gli elementi HTML a cui assegneremo i valori RSS.
Aggiungi dopo:
<!DOCTYPE html>
<html>
	<head>
		<meta charset="utf-8">
		<meta name="viewport" content="width=device-width,minimum-scale=1">
		<title>RSS News Feed</title>
		<link href="style.css" rel="stylesheet" type="text/css">
	</head>
	<body>
	    <header class="header">
            <h1 class="title">RSS News Feed</h1>
        </header>
		<main class="items">
			<?php foreach ($items as $item): ?>
            <a href="<?=$item->getElementsByTagName('link')->item(0)->textContent?>" class="item">
                <?php if ($item->getElementsByTagName('enclosure')->length): ?>
                <img src="<?=$item->getElementsByTagName('enclosure')->item(0)->getAttribute('url')?>" alt="<?=$item->getElementsByTagName('title')->item(0)->textContent?>" class="image">
                <?php endif; ?>
                <div class="details">
                    <span class="date" title="<?=$item->getElementsByTagName('pubDate')->item(0)->textContent?>"><?=time_elapsed_string($item->getElementsByTagName('pubDate')->item(0)->textContent)?></span>
                    <h2 class="title"><?=$item->getElementsByTagName('title')->item(0)->textContent?></h2>
                    <p class="description"><?=$item->getElementsByTagName('description')->item(0)->textContent?></p>
                </div>
            </a>
            <?php endforeach; ?>
        </main>
	</body>
</html>
Gli attributi della classe HTML riflettono le classi dichiarate nel nostro file del foglio di stile.
Se accediamo al file read.php nel nostro browser, sarà simile al seguente:
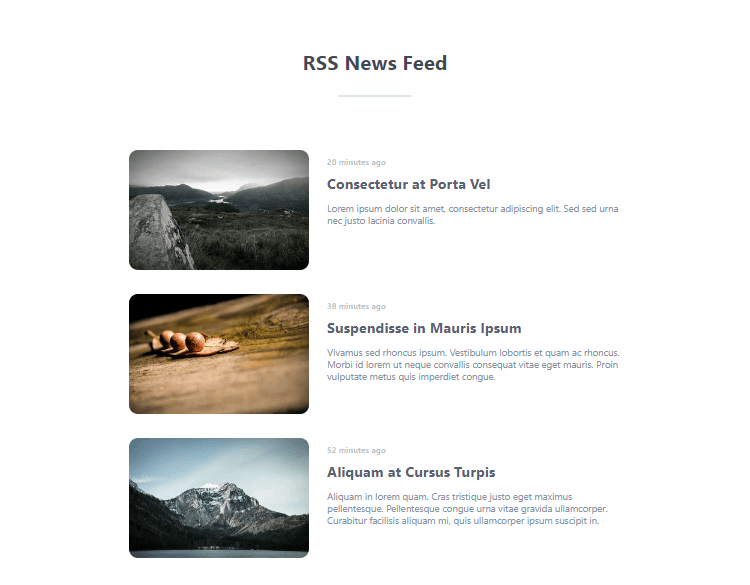
Supponendo che tu abbia aggiunto record al tuo database. Se non vengono visualizzati elementi, niente panico! È perché nessuno è stato ancora salvato nella nostra tabella delle notizie. Implementeremo il modulo per salvare i record nella sezione successiva.
Possiamo utilizzare il codice di questa sezione per recuperare i feed RSS da qualsiasi sito Web che li promuove. Tutto quello che dobbiamo fare è aggiornare la variabile $url in modo che punti al feed RSS.
Invia notizie al database
Infine, non possiamo popolare le notizie senza record nel nostro database, quindi in questa sezione implementeremo il modulo HTML per acquisire i dati con PHP e successivamente inseriremo i dati nella nostra tabella delle notizie utilizzando l’interfaccia PDO.
Crea il file create.php e aggiungi:
<?php
// Database connection variables
$db_host = 'localhost';
$db_name = 'phpnewsfeed';
$db_user = 'root';
$db_pass = '';
$db_charset = 'utf8';
// Connect to database using the PDO interface
try {
    $pdo = new PDO('mysql:host=' . $db_host . ';dbname=' . $db_name . ';charset=' . $db_charset, $db_user, $db_pass);
    $pdo->setAttribute(PDO::ATTR_ERRMODE, PDO::ERRMODE_EXCEPTION);
} catch (PDOException $exception) {
    // If there is an error with the connection, stop the script and display the error.
    exit('Failed to connect to database!');
}
// Form submit
if (isset($_POST['title'], $_POST['description'], $_POST['link'], $_POST['date'])) {
    // Validation
    if (empty($_POST['title']) || empty($_POST['description']) || empty($_POST['link']) || empty($_POST['date'])) {
        $msg = '<p class="msg error">Please fill out all fields!</p>';
    } else {
        // Image path
        $img = '';
        // Upload image if exists
        if (isset($_FILES['img']) && !empty($_FILES['img']['tmp_name'])) {
            $img = 'images/' . $_FILES['img']['name'];
            move_uploaded_file($_FILES['img']['tmp_name'], $img);
        }
        // Insert news into database
        $stmt = $pdo->prepare('INSERT INTO news (title, description, url_link, img, published_date) VALUES (?, ?, ?, ?, ?)');
        $stmt->execute([ $_POST['title'], $_POST['description'], $_POST['link'], $img, $_POST['date'] ]);
        // Output response
        $msg = '<p class="msg success">News created successfully!</p>';
    }
}
?>
Come prima, abbiamo incluso il codice di connessione PDO per connettersi al nostro database, poiché sarà richiesto di inserire un nuovo record. Successivamente, controlliamo se i dati acquisiti esistono e, in tal caso, possiamo procedere all’inserimento dei dati nel database.
Il codice caricherà anche un’immagine se ne viene selezionata una nell’elemento Carica immagine, che verrà successivo.
Aggiungi dopo:
<!DOCTYPE html>
<html>
	<head>
		<meta charset="utf-8">
		<meta name="viewport" content="width=device-width,minimum-scale=1">
		<title>Create News</title>
		<link href="style.css" rel="stylesheet" type="text/css">
        <style>
        html, body {
            background-color: #f9fafc;
        }
        </style>
	</head>
	<body>
	    <div class="create-news">

            <h1>Create News</h1>

            <form action="" method="post"  enctype="multipart/form-data">

                <label for="title"><span class="required">*</span>Title</label>
                <input type="text" name="title" id="title" placeholder="Title" required>

                <label for="description"><span class="required">*</span>Description</label>
                <textarea name="description" id="description" placeholder="Description" required></textarea>

                <label for="link"><span class="required">*</span>Link</label>
                <input type="url" name="link" id="link" placeholder="https://example.com/article/lorum-ipsum" required>

                <label for="img">Featured Image</label>
                <input type="file" name="img" id="img" accept="image/*">

                <label for="date"><span class="required">*</span>Publish Date</label>
                <input type="datetime-local" name="date" id="date" value="<?=date('Y-m-d H:i')?>" required>

                <?php if (isset($msg)): ?>
                <?=$msg?>
                <?php endif; ?>

                <button type="submit">Create</button>

            </form>

        </div>
	</body>
</html>
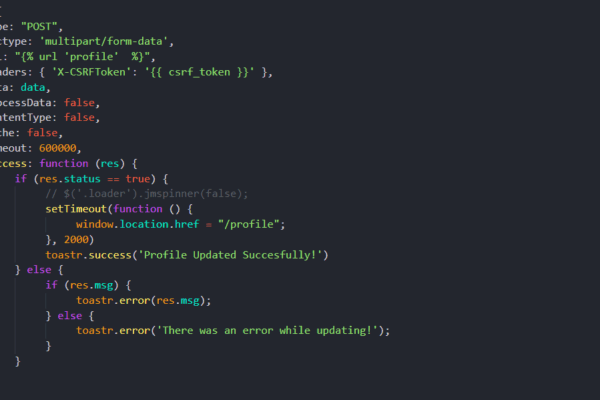
Come possiamo vedere, gli elementi del modulo rappresentano la struttura del nostro database. Il modulo eseguirà una richiesta POST al momento dell’invio. La variabile $_POST[‘name’] rifletterà l’attributo name assegnato agli elementi del modulo.
Se riscontriamo errori di convalida durante l’invio del modulo, verranno visualizzati nel punto in cui è definita la variabile $msg. Inoltre, per evitare troppe richieste di convalida al server, l’attributo requirente è stato aggiunto a vari elementi del modulo.
Suggerimento per la codifica
La funzione isset(), combinata con un’istruzione IF, previene il verificarsi di errori se una particolare variabile non viene dichiarata.
Se andiamo al file create.php, vedremo quanto segue:
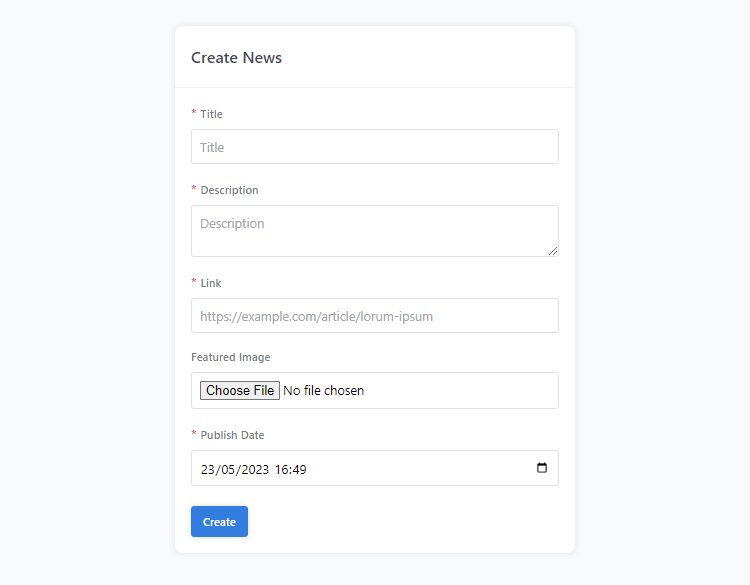
Se inseriamo i dati nel modulo e facciamo clic sul pulsante Crea, i dati dovrebbero essere inseriti nella tabella delle notizie. In caso contrario, mi assicurerei che le query SQL riflettano i dettagli del database (colonne, nome della tabella, ecc.).